Saturday, December 28, 2013

Deer Cap with patch

My niece is a deer hunter with her father.  I ran across this deer cap, and I apologize because I bought it over 6 months ago and can't remember where I found it.  

I had been seeing the cute patches added to caps around on Pinterest and thought it would be a cute idea to do for her.
My machine doesn't have a hat hoop so I made a patch and glued with 6000 glue.


It is hard to see, but on the side the cap came with a deer already embroidered on it.
I went with bright yellow to keep it with the neon orange color.
Dark Brown was used for circle and lettering.

I think it is fun, now how much she wears it is another question!
It was fun to make.
I hope you all had fun making Christmas gifts.  I would love to see them.

Jodie

Friday, December 27, 2013

Organizers

I made some organizers for Christmas presents this year and they have many pockets.
Everyone loved them!
Right now JoAnn's has the organizers on sale for $28.97.


The Old English Font on the first two were requested.  I chose the font on the bottom picture.
I prefer it over the Old English.

I recommend the oval shape over the square.  It has larger pockets and lots of divided ones.  You could use these for craft items, cosmetics, jewelry, travel, etc.

Jodie


Bowling Party T-shirt

My grandson just had his 5th birthday on the 23rd.
He had a bowling party and I found this appliqué to make him his shirt to wear.
It is the first appliqué I have done,  I am learning to get more confident about picking out fabric to go with appliqué.  I get so nervous it's not going to look good together.


He loved wearing his shirt for his party.  I was just plain excited the shirt fit him.  It was a surprise so no fitting prior to making!

Thanks for looking.

Jodie

Friday, December 20, 2013

Embroidered Aprons

I was having problems coming up with a gift to give to my husband, step-son and son-in-law.
Shopping at Sams I found a bag of 3 chef's aprons and bingo the idea hit me.  Here are my samples.  


If any of you need male gift ideas and you embroider, I hope this give you an idea.
The first embroidery came from Smart Needle, and the second came from Urban Threads

Have a Merry Christmas!

Jodie

Thursday, December 19, 2013

Sweatshirt Embroidery

The big thing right now is jumbo embroidery on sweatshirts.
I made one for my daughter which I believe turned out great and an additional on different color sweatshirt.  She absolutely loves them.


I am really enjoying my 10 needle embroidery machine.
I have had LOTS of orders for Christmas presents, so I have been able to experiment on many items.  I have done bags, backpacks, jackets, t-shirts, pajama pants, casserole carriers and scarves.

Now to get on with finishing up MY Christmas gifts!
Hope everyone is ready for the Holiday!
God Bless

Jodie

Wednesday, December 18, 2013

Silhouette Cameo

I found some plates at Target and grabbed a couple because I knew I could come up with something to use them as gifts.

My first one I used a dear head shape from Silhouette and made me a round red nose to put on it.  This gift went to a couple that the husband hunts a lot.


The second one I made for my in-laws who live in an assisted living place.  I felt like they needed something to add to Christmas Cheer in their apartment.


We call them Honey & Da

I hope you enjoyed.

Jodie


Tuesday, December 10, 2013

Lemon Sugar Scrub

Lemon Sugar Scrub Recipe


My daughter and I made some Christmas gifts over the Thanksgiving weekend.
I want to share the recipe, because my husband tried it out and came back for more.
Now that is a testimonial of how good this stuff is!

Supplies:
2 ½ cups granulated sugar, divided
¼ cup coconut oil
1 lemon

Put sugar in a large bow.  Set aside. Measure out ¼ cup of coconut oil and place it in a microwave safe bowl.  Heat coconut oil in the microwave for about 30 seconds, or until the oil is melted.  Pour oil over sugar and mix to continue.

Using a zester or small grater, zest rind of the lemon.  Then, cut zested lemon in half and, using a juicer, juice the lemon.  Remove any seeds from lemon juice.  Add lemon juice and zest to the sugar mixture and stir to combine.

If the sugar scrub is still too "wet", add up to a ½ cup more sugar until desired consistency is reached.

I wish I could tell you where I got this recipe, but I printed it off this past year and am not sure where it came from.  I would like to give the person credit for coming up with recipe.  It was not me.

Jodie

Monday, December 9, 2013

Silhouette Cameo


I was going to an Auction for a Philanthropic Women's Organization and we make things to raise money to give to our programs.  Normally I sew something, but not this year.


I made this using a shadow box and put ornaments in it that I bought at Hobby Lobby.
I printed the words Christmas and Cheer on my Silhouette Cameo with vinyl.

I was so pleased with the way it turned out.  It ended up selling for $50.00.  I was so happy to be able to contribute to continuing women's education program.

Christmas Cheer to you all!

Jodie

Thursday, November 28, 2013

Bag


I am planning on helping my sewing student make this bag, which is the Abby Bag from V and Company.  My example has double the size loops and I added a pocket on the inside.  I just can't get by with a tote that doesn't have a pocket.


It is reversible and is as cute on opposite side as regular.  
Since I am a seamstress I fell in love with the Moda ruler fabric.  The line is Potluck.
I picked out of my stash the mustache print because I thought they looked cute together.

The mustache's look okay going up or down so the directional fabric worked out okay.  This makes a pretty large tote.  I will next time use some iron on fleece to make it a little more stable.
The pattern called for light weight interfacing.  I think a little heavier would be more appropriate.

All and all, the pattern was easy and I love the look of the fabrics together.  I was going to give it to my daughter, but she is not into the mustache thing.  So lucky for me, I get to keep it!

Jodie

Sunday, November 24, 2013

Jewish Holiday Embroidery


I have a customer that is making a Hanukah table runner for you daughter in law.
She asked me to come up with a Menorah and Dreidel for the ends.
The table runner is going cross wise on the table.

I am pleased with the Menorah and Dreidel but I feel Happy Hanukah or their family name should be just below to fill up the middle.  She is happy with this look.  It is just my preference.  This is on both sides of the runner.

What do you all think?  I think it looks a little blank in the middle.  She is making a really wide table runner for these two embroideries.

Jodie

Thursday, November 14, 2013

Wedding Gift Idea

Need an idea for a great wedding gift?
I embroidered 16 napkins for a friend to give to her sister-in-law for her wedding present.


We debated on monogram or single initial.  We think this turned out beautiful.  The mint green matches the color in her formal dinner dishes.  She also has mint green casual dishes.
This napkin is a poly-cotton blend and washes well.


She will be giving the napkins today and she is so excited.  Her sister-in-law was just looking online this week for napkins.  She had forgotten to register any so this will be a pleasant surprise.

I think I want to buy some for myself and monogram me some now!

Jodie

Wednesday, November 13, 2013

Wedding Christmas Ornament


Enjoying my Cameo Silhouette...


I made this glass ball wedding ornament by cutting up the wedding invitation per line.
I then rolled it up and put down in a glass ball.

With my Silhouette Cameo I made wedding initials in her first initial, new last initial and his first initial.
On the opposite side I put the year.
I then tied it off with ribbon

I hope she love it!

Jodie

Tuesday, November 12, 2013

Embroidery

I have been having fun with my new embroidery machine.  I bought a BabyLock 10 needle about two months ago.

I am slow at learning, because I have so many new things to learn, including my Silhouette Cameo.

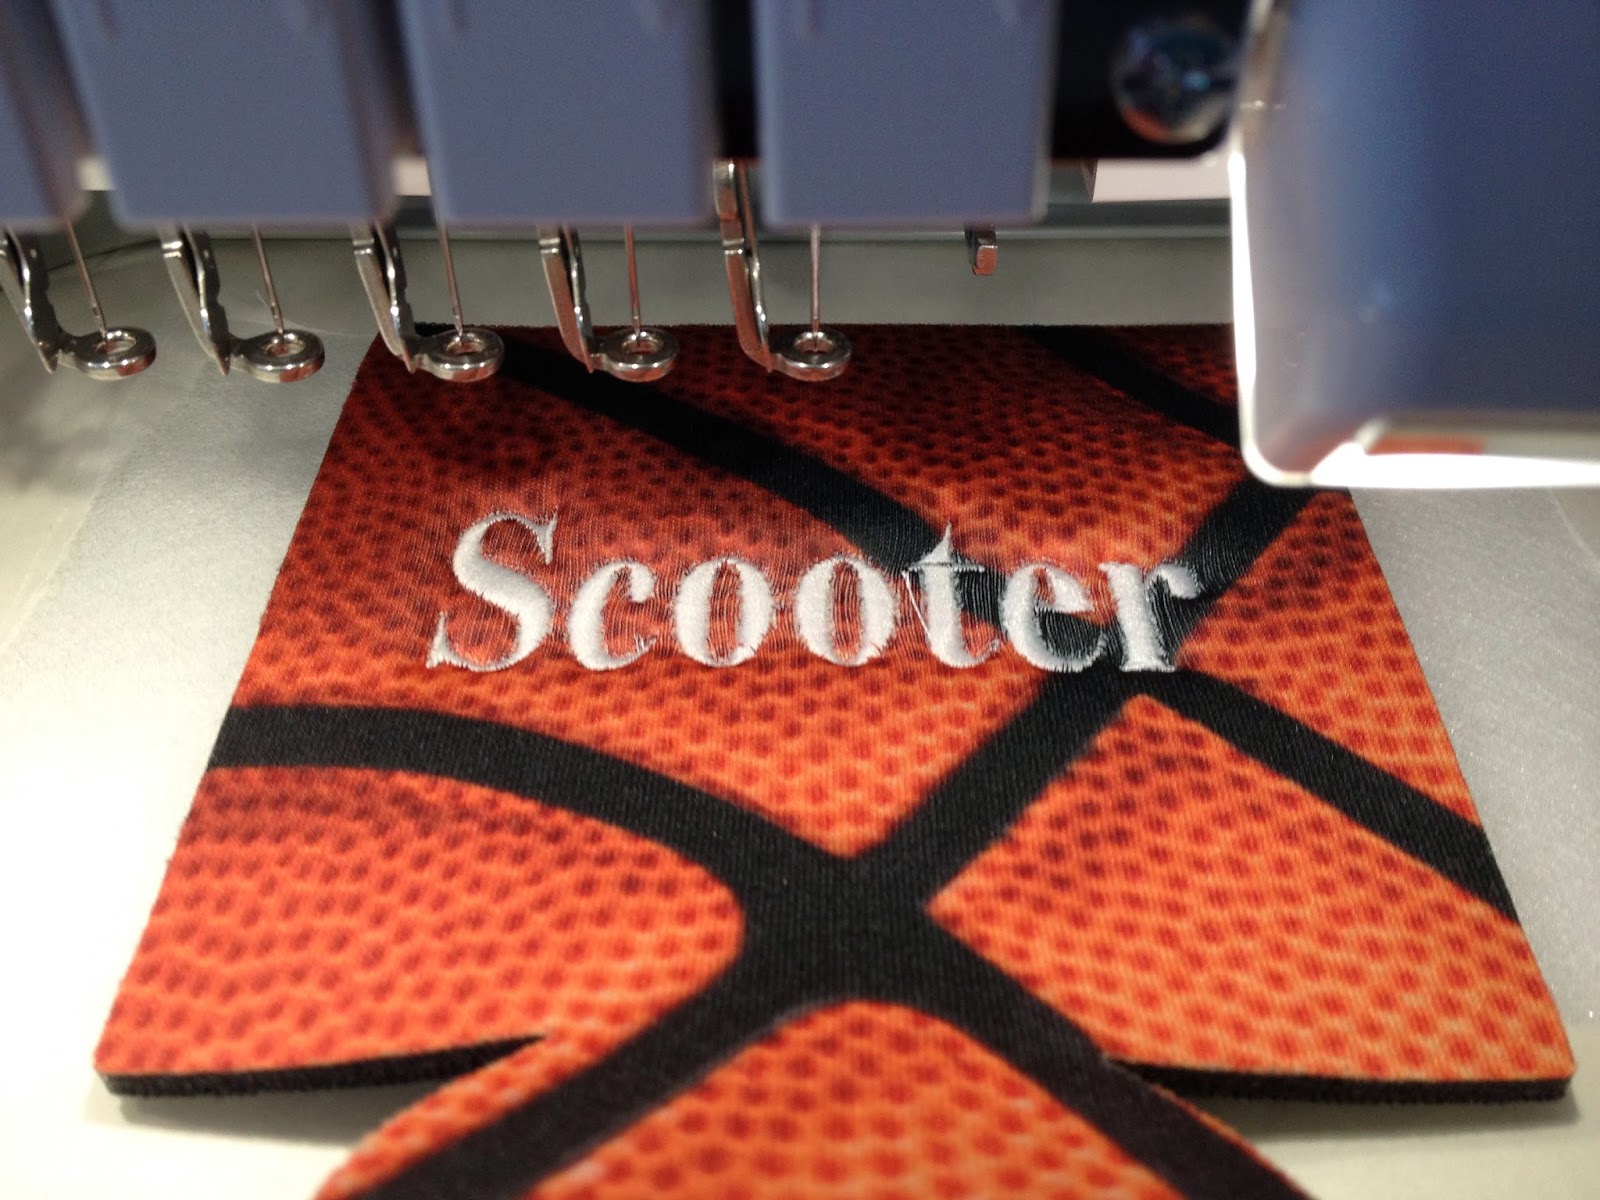
Here are a couple of pictures of things I have been monograming.


One is for my daughters boyfriend.  He is a basketball coach.  The chevron koosie is for a water bottle or 24 oz. can.  My daughter was complaining about her water bottle sweating in her backpack.
I hope this helps.

Jodie

Monday, November 11, 2013

Post Halloween table runner

I was running a little late on my Halloween this year.
My fabric was all ready I just didn't get it done in time for Halloween.

Better late, than sitting in a "to do bin" which might and might not get done!

This way I will be ready for next year.


I bought this spider fabric at JoAnn's and made the ruffles out of quilting cotton.  It is wide, but so is my dining room table.
This will fit perfect for next year, and it's done! Lol

Jodie

Thursday, October 31, 2013

Silhouette Cameo Retreat

I was fortunate enough to attend a Silhouette Cameo retreat by Terri Johnson in Atlanta.
It was fabulous and I learned so much.

I have owned my Cameo for a year but have yet to do much with it.  
I highly recommend her retreats.  I believe she is having one in Virginia next.

This is a picture of one of the items we made at retreat.  It is a Thanksgiving table runner.


It is the same on other end with leaves mixed up a little bit.
Don't you think it's fabulous.  
As I learn more I will be sharing what this great instrument does!

Jodie

Tuesday, October 15, 2013

Pajama pants


I am teaching beginner sewing lessons to a young lady.  
After taking her through a lesson on getting to know her sewing machine and a fabric store field trip, she wanted to make some pajama pants.

These are a pair I made.  The material inspired me.  Once I can start making a little money I plan to donate a percentage of my profit to the Humane Society.
My whole family has a huge love of animals and I feel that will give me great joy to give back to our loving 4 legged friends!

Have a great day!

JODIE

Tuesday, October 8, 2013

Stash Quilting

I was browsing this morning and found this great video to use up some stash.
I wanted to share with my followers.  
This would make a really cute quilt made out of children.s fabrics or those wonderful scraps of fabric that you can't  bare to get rid of.  It was found on Craftsy blog.  Link is attached to video.

Stash Busters With Joanna Figueroa


<iframe width=”420″ height=”315″ src=”//www.youtube.com/embed/-G2uu86Nldk” frameborder=”0″ allowfullscreen></iframe><p> See how expert patternmaker Joanna Figueroa creates a fresh, fun block in <a href=”http://www.craftsy.com/blog/2013/10/stash-busters-joanna-figueroa/”>this week’s episode of Stash Busters</a>!</p>


How to make your own block:

Step: 1: Choose fabrics that are fresh and fun.
Step 2: Cut strips in equal widths.
Step 3: Start joining the strips together.
Step 4: Press the strip sets open so they’re easy to work with.
Step 5: Create blocks with your strip sets, 7 in each block.
Step 6: Press blocks so all of your seams are going the same way.
Step 7: Add visual interest with triangles on corners.
Step 8: Use your pressing line as your stitching line.
Step 9: Open the squares and sew through the diagonal pressing line.
Step 10: Trim the extra fabric so you have corner triangles on each of your blocks.
Step 11: Audition layouts until you find your favorite.
Step 12: Press seams open so that they’ll “lock” beautifully.

Sunday, September 22, 2013

Halloween Dress

This weekend I had surprise company so had to whip up something really quick.  My Stepson and his family came to visit.  My granddaughter had to have a dress!


This pattern is from Whimsey Couture and it is her Peasant Dress pattern.  It went together really fast for me.

I have to admit, my model granddaughter did not like the idea of having her picture taken this morning.  I am prejudice and think she is just beautiful happy or not!

My granddaughter doesn't like the way shirring elastic feels.  This is the second outfit I have made her with shirring elastic.  Is it just her or do others find this common? 

I love using it because it is so simple and sweet.  But, for this child I am going to have to start using 1/4 inch elastic.

Jodie

Bitty Bunting Quilt


This is the cutest quilt and is a free pattern from Moda Bake Shop.  
I really want to make this one.  Do you all like this quilt?


Thursday, September 19, 2013

Pattern Weights


I have been using these weights for a long time and was getting jealous by seeing everyone on blogs and pintrest with cute pattern weights for they're sewing rooms. 
I decided it was time for me to do something to mine.  
The thought was sparked when I saw this washi tape at 
Office Depot.
I got back to my sewing room and started wrapping. 


Now I have my stash of washi tape wrapped washers to use in my sewing room.
I was too lazy to open up the center and didn't really see any point.  These are two washers glued together so they are easy to pic up.


I would love to see what you have done with pattern weights.  Do you have any cute ideas?

Jodie


Wednesday, September 18, 2013

Spirit team dress


I saw this t-shirt and got this great idea of using up some fabric I had in my stash.  I buy a lot of red because it is our team sport color for the Razorback's of Arkansas, and it red is one of my favorite colors.

This ruffle fabric was bought a couple of years ago to make my daughter a tunic and then we decided it might be a little overwhelming. 
When I saw this cute shirt I loved it and thought about my fabric.

I sewed it into a tube after cutting the amount I wanted.  I then just sewed it to bottom of t-shirt.  I just guessed at the amount for the length.  This fabric is so easy to adjust the length.  It doesn't ravel so you just cut between ruffles.

In the picture it looks really long and makes me realize how long and tall I am.  The dress actually hits me just below my middle thigh.  I think it will make a cute outfit for tailgating don't you?

You could use any team shirt you like and use coordinating ruffle fabric in your team color.  I have some of this fabric in royal blue and purple too.  I know there are lots of sport teams out there with those colors.

This would be precious done on a little girls t-shirt with an embroidery or appliqué to match color of skirt too.
Have fun with the idea!

Jodie

Sunday, September 15, 2013

Halloween


I have been thinking about Halloween.  I always do as soon as Labor Day Weekend is over.
I got busy making some pillows.  My step daughter has birthday in October and my step daughter in law has one the very next day.

Naturally I will have to give these as early Halloween gifts.
Its one of those things you fall in love with, but you wouldn't necessarily buy for yourself.  
(Deep down you would really want it though!)

I even made an extra one's, it will be interesting to see who gets them.  The pillow is hand embroidered and the little spider I made with two tiny buttons.

Happy Halloween everyone!  Thanksgiving and Christmas are not far off!

Jodie

Wednesday, September 11, 2013

Ironing Board for height


After working on quilt and curtains my neck was hurting so bad because I am too tall for my ironing board.

I decided to make myself one that was appropriate for my height.
This is a 2 X 4 board from Lowes that I covered with batting and then Insulbrite.  I staple gunned it around the bottom.  I then took deco weight fabric and covered that to make my cover. 

I love this new ironing station.  I secured it by using S screws in bottom and zip tied it to bars on top.  I got the 36" height table at the Container Store.  It is nice and stable.  

So long to back and neck aches from ironing!

Jodie

Tuesday, September 10, 2013

Curtains for dorm

My niece needed curtains for her two dorm windows.
I ordered shower curtains for one window that was huge.
Lowes cut me a PVC pipe to length and we used command hooks and gross grain ribbon to hang the rod.  I used 1" rod over the smaller rods, because it seemed more stable for an 83" length.


This picture here, is of curtains I made for the other window.  I found the fabric at Hancock's and bought every last inch and used every bit of it.  I even had to use a remnant that had a flaw, but is disguised in the gathers.

This is also a PVC rod cut to length.  The ends have caps on them so the ribbon will stay on.  She hung them with yellow gross grain ribbon on each end and in middle of command hooks that stuck above frame of window.  Dorms do not want you to leave anything permanent and we were looking for cheapest way to make something for one year.

Compared to the quilt in previous post, this was a no brainer.  I whipped it out on a last minute thought in one afternoon.
I'm sure glad that quilt is a done and gone!

Jodie

Monday, September 9, 2013

T-Shirt Graduation Quilt

It seems like it took me 100 hours but I have completed and delivered my promised T-shirt quilt to my niece.


My niece won a scholarship to play college basketball so I thought a nice graduation present would be to make her a T-shirt quilt out of her high school team shirts.

I have to admit it did not get me addicted to quilting.  This is my first quilt and it was very time consuming.  I tend to like instant gratification.

I used light weight woven interfacing behind each square and applied it before cutting out my pieces.  These are 12 1/2" squares.
Some of the square are pieced together.
I used bias binding and stitched in the ditch for quilting.

I am pleased with it and am ready to move on to other projects.
She loves it, so that is a plus!

Jodie

Saturday, August 3, 2013

Upcycle

I bought a new machine recently at the Matha Pullem Market in Dallas.
It was shipped to me in this HUGE box.

My grandson loved it!  The handles on the box made for great peep holes.  My husband taped it up and made it into a Fort.  
Our house was built in the 60's so the box would only fit into the front door and not into any of the other door ways.

This picture is taken of it on top of the car, getting ready to be transported to his house by my husband.  They just live in next neighborhood about a mile away.

I told my grandson to get his Mom to spray paint the box and leave the black band with Ellisimo BabyLock on it so that could be the name of his fort.  

Friday, August 2, 2013

Inspiration Board

I consider one of the most important things in a sewing room to be an inspiration board.  I use mine for sayings, project ideas, reminders, receipts until filed, pictures of family, etc...

36" x 46" with frame

So, I require a LARGE Inspiration Board
I knew I wanted a large one so I went to my attic.
I found a large frame that had been up there for over eleven years.
Yes, it was covered in dust and required some major scrubbing to be acceptable.  I love the frame though and had been saving for either of my girls when they get their own place.  It was just one of those things I just couldn't let go of!  Way too many possibilities of which I didn't know until now.   :)

I had Home Depot cut me a piece of plywood to fit 1 inch larger than frame.  I stuck 12 X 12 cork board bought from Office Depot to the board minus 5/8 inch all the way around.  My reasoning there is one inch board came out to be 1/2 inch all around larger than frame. On top of that I put thin batting I already had.

Sorry I didn't take pictures.  I was doing this at 10:30 at night and had not had dinner yet.  I was on a roll.

The purple linen I already had in my stash and had 3 1/2 yards of it.  It is a heavier weight like for bags.  I figured minus 40 inches wouldn't risk not having enough for another project someday.  
Plus, it was in stash, meaning it might be a long time before being used!  :)

On this project, I can say everything went BRAVO!
I stapled gunned the fabric on.  The board and cork fit perfectly into the lot.  By allowing 5/8" around board for the thin cork, it made it fit perfectly in frame.  
Using small nails I nailed to back of frame.  
I am now ready to Inspire myself!

Thursday, August 1, 2013

Dress


SIS BOOM  Pattern
Front

Back

This project got started late summer of 2012.  I got the dress all cut out and ended up working on gifts for others and never got it made.

I have now made and worn.  I love the pattern and how it turned out.  My husband is not into the print, he is a solid man, but I love it!  I am into all the new modern designer quilting cottons!

Sis Boom patterns allow for tall so they work out great for me.  I am 5 feet 8 inches and that is her longest length.  Therefore, I do not have to do the alterations.  It comes as a PDF and is very well drafted.  I shortened two inches and had to take in below bust down to hem 1/2 inch total.  I did this on the side seams.  The pattern has a long zipper down the back.  I made the size 6.

There was no mention of interfacing, but having experience, I put light iron on interfacing in the neck facing as well as the waist band.  I can't wait to make another.  :)

Jodie

Before and After

BEFORE - yuck


As you can tell my ironing board is embarrassing!
I decided for my new sewing room, I needed to tidy things up a bit.
My first project was recovering my ironing board.  I did this before even getting my all my machine collection  over to the studio.

AFTER - better


It looks a little dizzy at this angle, but I am real pleased with it.
I left the previous padding on and used deco weight Premier Fabric to cover.
My thinking here was, I already had it on hand and stability over time would be better than quilting weight or plain cotton fabric.

I laid the board down on its'  back and cut the fabric around allowing for tuck and fold for elastic.
This was really simple and highly recommend it to anyone just to spruce up the sewing room.

Jodie

Wednesday, July 10, 2013

Beginning

Here I am beginning my first post to start out my new Studio Name.  

I have changed from a sewing room and moved on to a small home I own that I am using for a Studio.

I will be using this place as a meet up of Right Brain thinkers, in hopes to join in the fun of sewing, 
crafting, painting, handwork, and pot lucks around laughter.  You name it, my place is up for it.  

My previous blog was and is ButtonsCreates and I will keep it for my various crafting for now, but plan to move all of my postings to this site as time allows.

This has been a long coming dream!  I will keep you up on the details and share with you what I am doing as well as friends.


This has been my house my daughter lived in for college.  I will be updating landscaping as well.  I want it to be very welcoming!

Wish me Luck!!!

Jodie

Thursday, June 27, 2013

Repurposed Frame

Another jewelry frame it is!  This time it is oval.

I have two daughters, so making for one and then making for the other is a given.  
It maybe different things, but always going back and forth.

There is a great story behind this frame!
Do you recognize this from the 70's decor?


My daughter's boyfriend was selling his house and throwing these frames with mirrors away.

He had redone the bathrooms in the house and there were two of these in the hall bath.

When I saw them, I had to have them.  "I too was thinking, these mirrors (are just like the beveled I had once given to Goodwill myself), back in the 80's refinishing a bathroom.
(As I have gotten older I have come to appreciate the old much more.)These mirrors were heavy.  I had them stored in my attic thinking I would repurpose them someway.

I was in my attic a couple of weeks ago and accidentally broke one - well naturally I knew what to do.

      jewelry frame

I primed and sprayed this frame knowing her new bedroom and bathroom were turquoise.  The color is a little off with the towels, but right on with her bedroom and other belongings.
We picked this color by iPhone images.  She lives 6 hours from me.

This time I put felt all around the back with glue.  It was difficult getting the wiring staple gunned in a clean oval shape.  I had to wear heavy gloves and do some light hammering.
I felt like the felt would protect the walls from any scratches.

She has filled it up quite nicely don't you think?

JodieLen


Sunday, June 2, 2013

Tote Bag

Saturday I spent the afternoon at our lake place sewing because it was raining and that is what I like to do.  I love it at the lake when it rains.

I have been thinking about this tote bag for over two months for an exchange and I had to delve into
it, to get my creativity going.  Sometimes I am just blank.


I looked at a grocery sack and just drew on newspaper and added a few inches in length and in handles.

As I was cutting it out I thought, "I ought to put an umbrella pocket on it". 
I don't recall ever seeing one, but wouldn't it be nice to have a tote with a spot for your umbrella.

It was raining, remember, so I was kinda thinking in that direction.
Here's a close up with lining in pocket.


The way the sun is shining Sunday afternoon it gave off a more turquoise tint, but it really matches.

I boxed off the bottom with the bottom of pocket in seam for a little more stability.
I pre-washed this fabric, because I wanted it to be something easy to grab 
for shopping, picnic, grocery, baby....


Here is a view from the side.  I was shocked I got the pattern matched up as good as I did.

I felt like the inside needed pockets as well.  I already had planned to make those.
I have so many bought bags with no pockets inside and I gripe every time I use one of them.


This is three pockets made with one long piece double sided.
I sewed it on before assembling lining together and put on opposite side
of umbrella pocket for balance. :)

The middle pocket has a pleat so it can hold more with smaller width pocket on each side.


The bag turned out reversible, which was not my original intention.  
The leaf print is decor weight fabric and the bandana type fabric is quilting weight fabric.

These next three pictures are my fake lake ducks and my new friend, that must be someone's pet.
This goose came up to me a couple of weekends ago and let me pet it and it got in my lap!
I was shocked and happy the dogs were inside!


Here he decided he needed a nap.  You can see my rock duck in background.

Jodie